Inspectial
- Inspectial
- Free checklists
- Culverts
Manhole inspection form
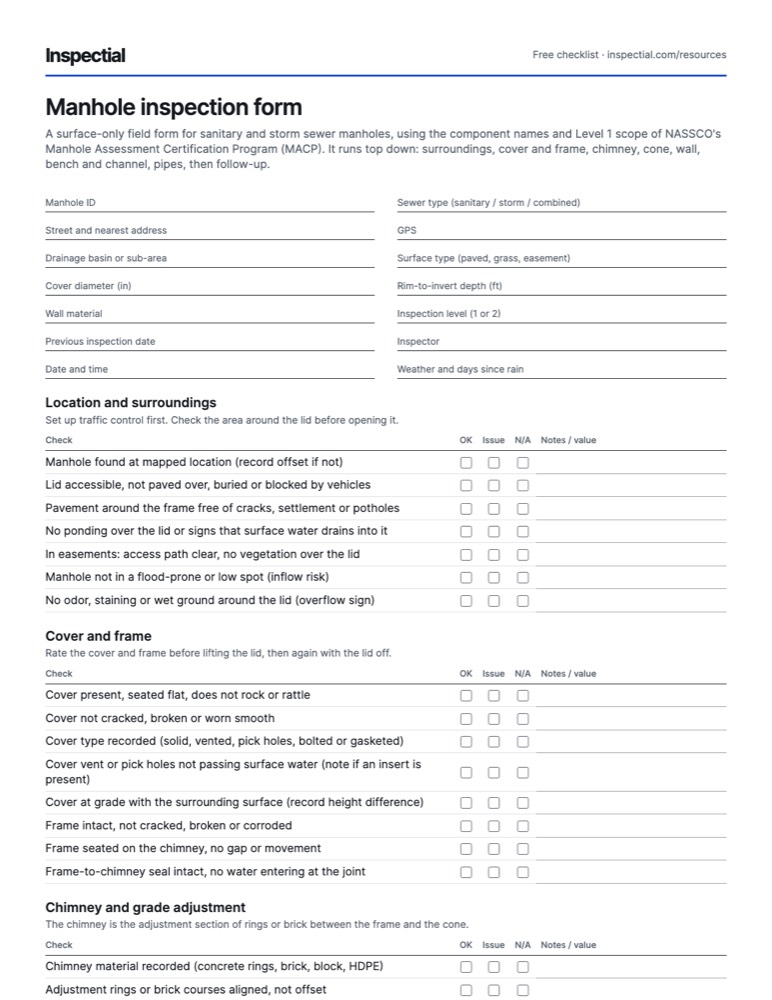
A surface-only field form for sanitary and storm sewer manholes, using the component names and Level 1 scope of NASSCO's Manhole Assessment Certification Program (MACP). It runs top down: surroundings, cover and frame, chimney, cone, wall, bench and channel, pipes, then follow-up.
What is a manhole inspection form?
A manhole inspection form is a field record of a sewer or storm manhole's condition. With the cover off and without entering, the inspector checks the cover, frame, chimney, cone, wall, bench, channel, steps and connecting pipes, and notes infiltration and inflow, corrosion, roots, debris and surcharge marks, then flags whether cleaning, repair or a detailed inspection is needed.
When to inspect
No federal rule sets a manhole inspection interval. Owners set it in their sewer system management or CMOM program (EPA's CMOM guide asks for a planned, documented inspection program), and consent decrees often fix a cycle. Many utilities inspect every manhole once per multi-year cycle, high-risk ones more often, and also inspect after overflows, odor or I&I complaints, and before pipe lining.
The checklist
Every row is one observable check. Mark one answer per row and write what you saw or measured; the PDF adds a findings table and sign-off.
Header
- Manhole ID
- Sewer type (sanitary / storm / combined)
- Street and nearest address
- GPS
- Drainage basin or sub-area
- Surface type (paved, grass, easement)
- Cover diameter (in)
- Rim-to-invert depth (ft)
- Wall material
- Inspection level (1 or 2)
- Previous inspection date
- Inspector
- Date and time
- Weather and days since rain
Location and surroundings
Set up traffic control first. Check the area around the lid before opening it.
| Check | OK | Issue | N/A | Notes / value |
|---|---|---|---|---|
| Manhole found at mapped location (record offset if not) | ||||
| Lid accessible, not paved over, buried or blocked by vehicles | ||||
| Pavement around the frame free of cracks, settlement or potholes | ||||
| No ponding over the lid or signs that surface water drains into it | ||||
| In easements: access path clear, no vegetation over the lid | ||||
| Manhole not in a flood-prone or low spot (inflow risk) | ||||
| No odor, staining or wet ground around the lid (overflow sign) |
Cover and frame
Rate the cover and frame before lifting the lid, then again with the lid off.
| Check | OK | Issue | N/A | Notes / value |
|---|---|---|---|---|
| Cover present, seated flat, does not rock or rattle | ||||
| Cover not cracked, broken or worn smooth | ||||
| Cover type recorded (solid, vented, pick holes, bolted or gasketed) | ||||
| Cover vent or pick holes not passing surface water (note if an insert is present) | ||||
| Cover at grade with the surrounding surface (record height difference) | ||||
| Frame intact, not cracked, broken or corroded | ||||
| Frame seated on the chimney, no gap or movement | ||||
| Frame-to-chimney seal intact, no water entering at the joint |
Chimney and grade adjustment
The chimney is the adjustment section of rings or brick between the frame and the cone.
| Check | OK | Issue | N/A | Notes / value |
|---|---|---|---|---|
| Chimney material recorded (concrete rings, brick, block, HDPE) | ||||
| Adjustment rings or brick courses aligned, not offset | ||||
| No missing mortar, loose brick or deteriorated rings | ||||
| No infiltration or staining through the chimney joints | ||||
| No roots entering through the chimney |
Cone and wall
Look down with a strong light or pole camera. Record what you cannot see rather than guessing.
| Check | OK | Issue | N/A | Notes / value |
|---|---|---|---|---|
| Cone or corbel intact, no cracks, breaks or missing pieces | ||||
| Wall joints sealed, no gaps or offset between sections | ||||
| Wall surface sound, no cracks, holes or missing brick | ||||
| No corrosion or exposed aggregate from hydrogen sulfide (note depth band) | ||||
| No active infiltration (record dripper, runner or gusher and location) | ||||
| No mineral deposits or staining that point to past leaks | ||||
| No roots through the cone, wall or joints | ||||
| Liner or coating intact, not peeling, blistered or delaminated | ||||
| Steps present, secure and not corroded (record count; never use them to enter) | ||||
| No debris, grease or fats hanging on the walls |
Bench and channel
The bench is the sloped shelf at the base; the channel carries flow through the manhole.
| Check | OK | Issue | N/A | Notes / value |
|---|---|---|---|---|
| Bench intact, no cracks, holes or missing sections | ||||
| Bench free of debris, grease or solids buildup | ||||
| Channel intact and shaped to the pipes, no erosion or missing sections | ||||
| Flow passes through the channel without ponding or backing up | ||||
| No sediment, grit or debris in the channel (record depth) | ||||
| No surcharge marks above the crown of the outgoing pipe (record height) | ||||
| Flow appearance normal for the sewer type (note color, odor, unusual flow) |
Pipe connections
Record each pipe by clock position, looking downstream.
| Check | OK | Issue | N/A | Notes / value |
|---|---|---|---|---|
| All incoming and outgoing pipes recorded (clock position, size, material) | ||||
| Pipe connections sealed at the wall, no gap or soil showing | ||||
| No infiltration around pipe penetrations | ||||
| No roots or debris at pipe openings | ||||
| Drop connection or inside drop intact, not blocked or broken | ||||
| Pipe ends not broken, offset or protruding into the manhole | ||||
| Storm or dry-weather flow in a sanitary manhole recorded (possible cross-connection) |
Rating and follow-up
Answer before closing the lid. Reseat the cover and confirm it sits flat.
| Check | Yes | No | N/A | Notes / value |
|---|---|---|---|---|
| Immediate hazard found (missing or broken cover, collapse, overflow) and reported | ||||
| Cleaning needed (debris, grease, roots or sediment) | ||||
| Repair needed (frame reset, chimney seal, wall or bench repair) | ||||
| Lining or rehabilitation recommended | ||||
| Detailed (Level 2) inspection or CCTV of connecting pipes recommended | ||||
| Possible inflow source found (vented lid in low spot, cross-connection) | ||||
| Inventory data corrected (ID, location, depth or pipe count) | ||||
| Cover reseated and site left safe |
Component condition (worst defect controls)
Rate the asset by its worst defect, best to worst.
- 1 Excellent
- No defects, or minor ones with no effect on structure or flow.
- 2 Good
- Minor defects such as light staining or hairline cracks. No action now.
- 3 Fair
- Moderate defects such as weeping joints, light corrosion or minor root intrusion. Plan maintenance.
- 4 Poor
- Severe defects such as active infiltration, missing mortar, exposed aggregate or a loose frame. Repair soon.
- 5 Immediate attention
- Failed or failing: broken or missing cover, collapse, gushing infiltration or overflow. Act now.
Photos to take
- Lid in place with the surrounding pavement, wide enough to show location
- Cover and frame with the lid off
- Looking straight down the full depth from the rim
- Chimney and frame seal close-up
- Bench and channel from the top
- Each incoming and outgoing pipe opening, with clock position noted
- Close-up of each defect rated 3 or worse, with a scale reference
Field tips
- Never enter a manhole to inspect it. A permit-required confined space needs an entry permit, an attendant, gas monitoring and a rescue plan under OSHA 1910.146.
- Test the air at the opening with a calibrated four-gas meter before leaning over it; hydrogen sulfide can be present even when there is no odor.
- Inspect in dry weather to see infiltration and in wet weather to see inflow. Note days since rain on every form.
- Record grade problems separately from structural defects: a cover an inch low is a road maintenance job, not a failing manhole.
- Use a pole camera or a light on a pole for deep structures, and log the depth you could actually see.
- Name pipes by clock position looking downstream, so the next crew and the CCTV contractor match the same pipe.
- Reseat the cover and check it is flat before leaving; a rocking lid is a traffic hazard and a noise complaint.
Standards and sources
Checked against these sources on . Your agency's own manual takes precedence.
Questions
What is a MACP Level 1 manhole inspection?
MACP Level 1 is NASSCO's screening inspection. The cover is removed and the inspector records the manhole from the surface without entering: cover, frame, chimney, cone, wall, bench, channel, steps and pipes, with general condition and visible defects. It helps owners decide which manholes need a detailed Level 2 inspection.
What is the difference between MACP Level 1 and Level 2?
Level 1 is a quick surface screening of each component's general condition. Level 2 is a detailed inspection that codes each defect by component and location using the same defect codes as PACP pipe inspections, usually with a camera, and produces condition scores for rehabilitation design.
How often should manholes be inspected?
There is no federal interval. Utilities set it in their CMOM program or sewer system management plan, and consent decrees often fix a cycle. A common approach is to inspect every manhole once per multi-year cycle and high-risk ones, such as those with overflows, odor complaints or I&I, more often.
What are signs of infiltration and inflow in a manhole?
Infiltration is groundwater entering through cracks, joints and pipe connections: look for drips, running water, mineral deposits and stains. Inflow is surface water entering through vented or low covers, the frame seal or cross-connections: look for ponding over the lid, debris on the bench and high flow after rain.
Do you need to enter a manhole to inspect it?
No. A Level 1 inspection is done from the surface with a light, mirror or pole camera. Entering a manhole is a permit-required confined space entry under OSHA 1910.146, which needs an entry permit, a trained attendant, atmospheric testing and a rescue plan.
Do this inspection on your phone: AI drafts it, you approve
Inspectial turns the photos, voice notes and GPS from this checklist into a structured, map-ready inspection record. Every finding links to its photo, and nothing is official until you approve it.
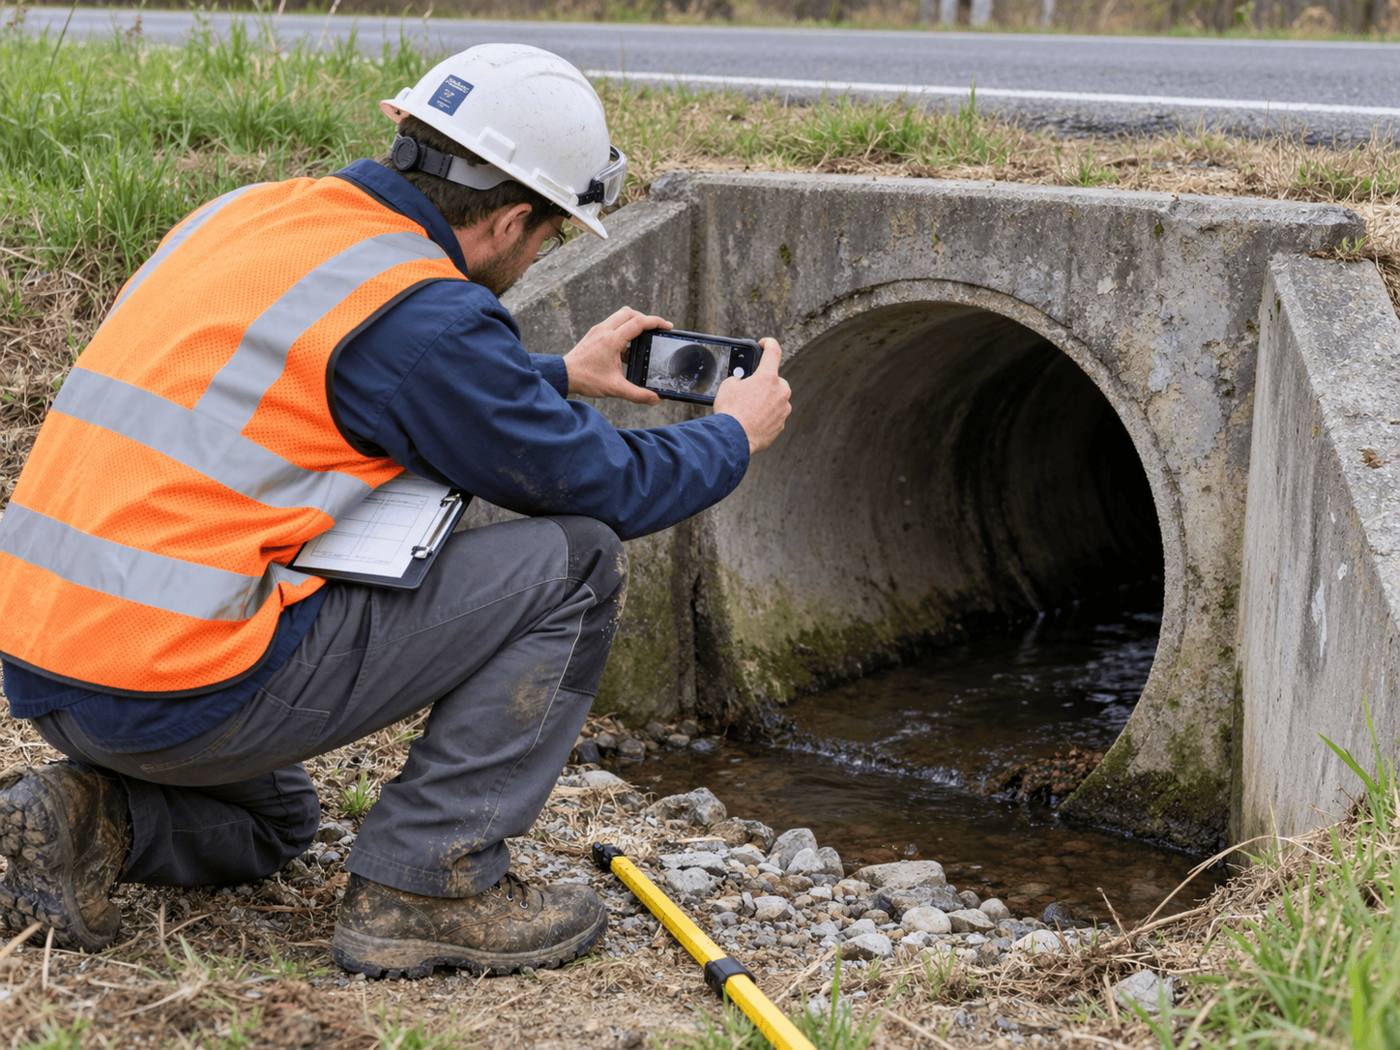
- Headwall · surfaceweatheringAI suggested
- Barrel · surfacestainingAI suggested
- Barrel · vegetationmoss at wall baseAI suggested