Inspectial
- Inspectial
- Free checklists
- Pre-construction surveys
Pre-construction condition survey checklist
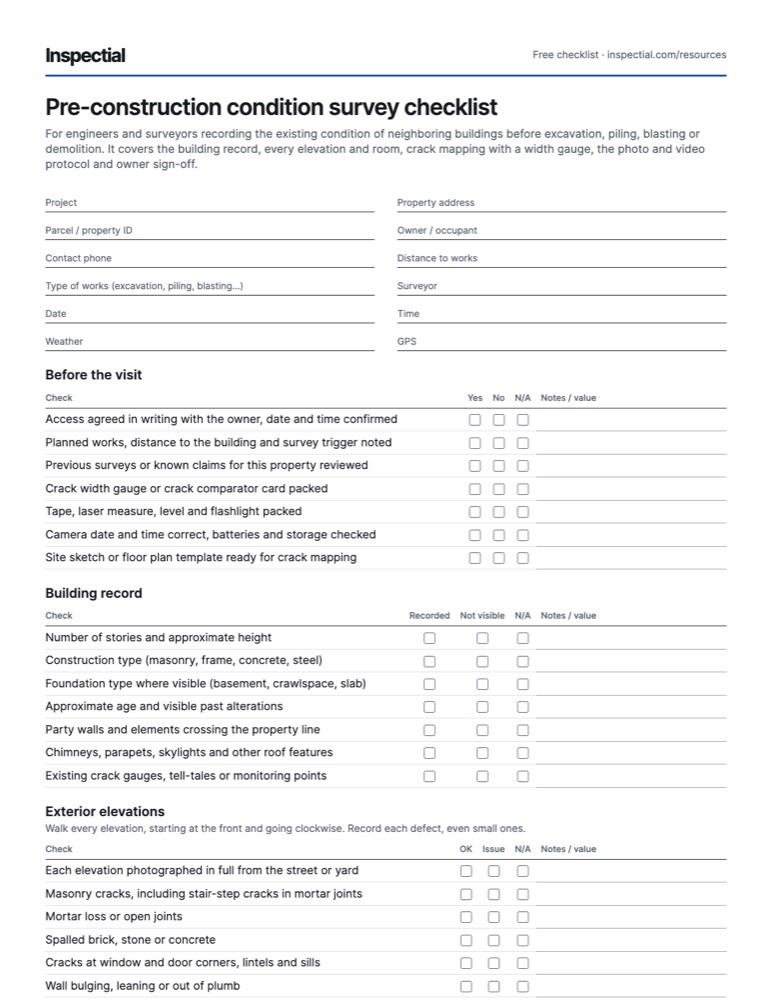
For engineers and surveyors recording the existing condition of neighboring buildings before excavation, piling, blasting or demolition. It covers the building record, every elevation and room, crack mapping with a width gauge, the photo and video protocol and owner sign-off.
What is a pre-construction survey checklist?
A pre-construction survey is a documented baseline of the condition of buildings and structures near a construction site, recorded before work that could cause vibration or ground movement. It logs every existing crack and defect by location, type and measured size, with photos and video, so later damage claims can be checked against it.
When to inspect
Once, before work starts, then repeated as a post-construction survey when the work ends or a claim arrives. Philadelphia Code §4-A-3307 requires a survey by a licensed PE when, for example, excavation goes more than 5 ft below adjacent grade within 10 ft of a building. For surface coal mining, 30 CFR 816.62 gives owners within 1/2 mile the right to request a preblasting survey. Elsewhere it is set by contract, permit conditions or the contractor's insurer.
The checklist
Every row is one observable check. Mark one answer per row and write what you saw or measured; the PDF adds a findings table and sign-off.
Header
- Project
- Property address
- Parcel / property ID
- Owner / occupant
- Contact phone
- Distance to works
- Type of works (excavation, piling, blasting…)
- Surveyor
- Date
- Time
- Weather
- GPS
Before the visit
| Check | Yes | No | N/A | Notes / value |
|---|---|---|---|---|
| Access agreed in writing with the owner, date and time confirmed | ||||
| Planned works, distance to the building and survey trigger noted | ||||
| Previous surveys or known claims for this property reviewed | ||||
| Crack width gauge or crack comparator card packed | ||||
| Tape, laser measure, level and flashlight packed | ||||
| Camera date and time correct, batteries and storage checked | ||||
| Site sketch or floor plan template ready for crack mapping |
Building record
| Check | Recorded | Not visible | N/A | Notes / value |
|---|---|---|---|---|
| Number of stories and approximate height | ||||
| Construction type (masonry, frame, concrete, steel) | ||||
| Foundation type where visible (basement, crawlspace, slab) | ||||
| Approximate age and visible past alterations | ||||
| Party walls and elements crossing the property line | ||||
| Chimneys, parapets, skylights and other roof features | ||||
| Existing crack gauges, tell-tales or monitoring points |
Exterior elevations
Walk every elevation, starting at the front and going clockwise. Record each defect, even small ones.
| Check | OK | Issue | N/A | Notes / value |
|---|---|---|---|---|
| Each elevation photographed in full from the street or yard | ||||
| Masonry cracks, including stair-step cracks in mortar joints | ||||
| Mortar loss or open joints | ||||
| Spalled brick, stone or concrete | ||||
| Cracks at window and door corners, lintels and sills | ||||
| Wall bulging, leaning or out of plumb | ||||
| Foundation wall cracks above grade | ||||
| Gutters, downspouts and visible roof condition | ||||
| Sidewalk, steps and driveway cracks or displacement | ||||
| Retaining walls, garden walls and fences | ||||
| Pools, patios and outbuildings | ||||
| Visible utilities: meters, wells, septic covers, cleanouts |
Interior, room by room
In each room record walls, ceiling, floor, doors and windows in a fixed order, so the post-construction survey can follow it.
| Check | OK | Issue | N/A | Notes / value |
|---|---|---|---|---|
| Room photographed: each wall, ceiling and floor | ||||
| Plaster or drywall cracks on walls | ||||
| Ceiling cracks | ||||
| Nail pops and drywall joint cracks | ||||
| Plaster loss or delamination | ||||
| Water stains and signs of active leaks | ||||
| Floor cracks, cracked tiles or uneven floors | ||||
| Doors that stick, rub or don't latch | ||||
| Windows that stick, with cracked glass or gaps at the frame | ||||
| Basement or crawlspace walls: cracks, efflorescence, seepage | ||||
| Basement slab cracks | ||||
| Existing repairs, patches or fresh paint over cracks |
Crack mapping and measurement
Every crack gets one entry. Width comes from a gauge, never estimated from a photo.
| Check | Done | Not done | N/A | Notes / value |
|---|---|---|---|---|
| Crack given a unique ID and marked on the sketch or plan | ||||
| Location recorded: room or elevation, wall, height and distance from a corner | ||||
| Orientation recorded: horizontal, vertical, diagonal or stair-step | ||||
| Length measured | ||||
| Width measured with the gauge at the widest point | ||||
| Close-up photo taken with the gauge or a scale in frame | ||||
| Wide photo taken showing where the crack is on the wall | ||||
| Tell-tale installed where agreed, with ID and baseline reading |
Photo and video protocol
| Check | Yes | No | Notes / value |
|---|---|---|---|
| Every photo time-stamped and geotagged | |||
| Narrated video walkthrough of every room and elevation | |||
| Photo log links each photo to its room, wall and crack ID | |||
| Rooms not accessed listed with the reason | |||
| Files copied off the device before leaving site |
Owner sign-off
| Check | Yes | No | N/A | Notes / value |
|---|---|---|---|---|
| Owner or occupant present during the survey | ||||
| Owner shown the main existing defects | ||||
| Rooms or areas refused by the owner recorded | ||||
| Owner and surveyor signatures with date | ||||
| Copy of the report delivered to the owner before works start |
Crack width categories (BRE Digest 251)
- 0 Negligible
- Hairline cracks under 0.1 mm.
- 1 Very slight
- Fine cracks up to 1 mm, easily treated during normal decoration.
- 2 Slight
- Cracks up to 5 mm, easily filled. Doors and windows may stick slightly.
- 3 Moderate
- Cracks 5 to 15 mm, or several up to 3 mm. Needs opening up and repair by a mason.
- 4 Severe
- Cracks 15 to 25 mm, also depending on number. Extensive repair; walls may lean or bulge.
- 5 Very severe
- Cracks over 25 mm. Major repair; beams lose bearing, walls lean badly, risk of instability.
Photos to take
- Each full elevation from the street or yard, with the house number visible on the front
- Each room from the doorway, then each wall, the ceiling and the floor
- Wide shot of every crack showing its position on the wall
- Close-up of every crack with the width gauge or a scale readable in frame
- Doors and windows that stick or show gaps, in the closed position
- Water stains, past repairs and existing monitoring devices
- Sidewalk, driveway, retaining walls and other site features
- A narrated video walkthrough of the whole property
Field tips
- Measure, don't estimate. A crack recorded as 'hairline' with no width reading is hard to compare against later.
- Work in a fixed order in every room (for example the entry wall, then clockwise, then ceiling and floor) so the post-construction survey can follow the same route.
- Record what you can't see. Furniture against a wall, locked rooms and stored goods are part of the baseline too.
- Photograph small defects as well as big ones. Disputes are usually about the cracks nobody thought were worth recording.
- Describe, don't diagnose. Note location, type and size; leave the cause of an existing crack to the engineer's report.
- Leave the owner a copy. A baseline the owner has seen and signed is far stronger than one they've never seen.
Standards and sources
Checked against these sources on . Your agency's own manual takes precedence.
Questions
What is included in a pre-construction survey?
A record of the building (stories, construction type, party walls), photos of every elevation and room, and a defect log with the location, type and measured size of every existing crack. Most surveys add a narrated video, a crack map and the owner's signature. The report is shared with the owner and kept until the post-construction survey.
Who does a pre-construction survey?
Usually an engineering, forensic or survey firm hired by the contractor, the developer or their insurer. Some jurisdictions name the qualification: Philadelphia requires a licensed professional engineer for surveys triggered by §4-A-3307. Blasting contractors often use specialist pre-blast survey firms.
How far from the site should properties be surveyed?
It depends on the rule or contract. Philadelphia's trigger includes excavation more than 5 ft below adjacent grade within 10 ft of a building and any work within 90 ft of a historic-register building. For surface coal mining blasts, 30 CFR 816.62 covers dwellings within 1/2 mile of the permit area. Otherwise the engineer sets the radius from the expected vibration and ground movement.
How do you measure crack width?
With a crack width gauge or comparator card held across the crack at its widest point, read in millimeters. Take a close-up photo with the gauge readable in frame and a wide photo showing where the crack is. Where movement must be tracked during the works, install a tell-tale and record its baseline reading.
Can a homeowner refuse a pre-construction survey?
Yes, access to private property needs the owner's consent. Record the refusal in writing, with the date and who refused, and survey what you can from the public right-of-way. That record matters if the owner later claims damage.
What is the difference between a pre-construction survey and a post-construction survey?
The pre-construction survey is the baseline before the works. The post-construction survey repeats it after the works, following the same rooms and crack IDs, so new or wider cracks can be told apart from existing ones. Without the first, the second has nothing to compare against.
Do this inspection on your phone: AI drafts it, you approve
Inspectial turns the photos, voice notes and GPS from this checklist into a structured, map-ready inspection record. Every finding links to its photo, and nothing is official until you approve it.
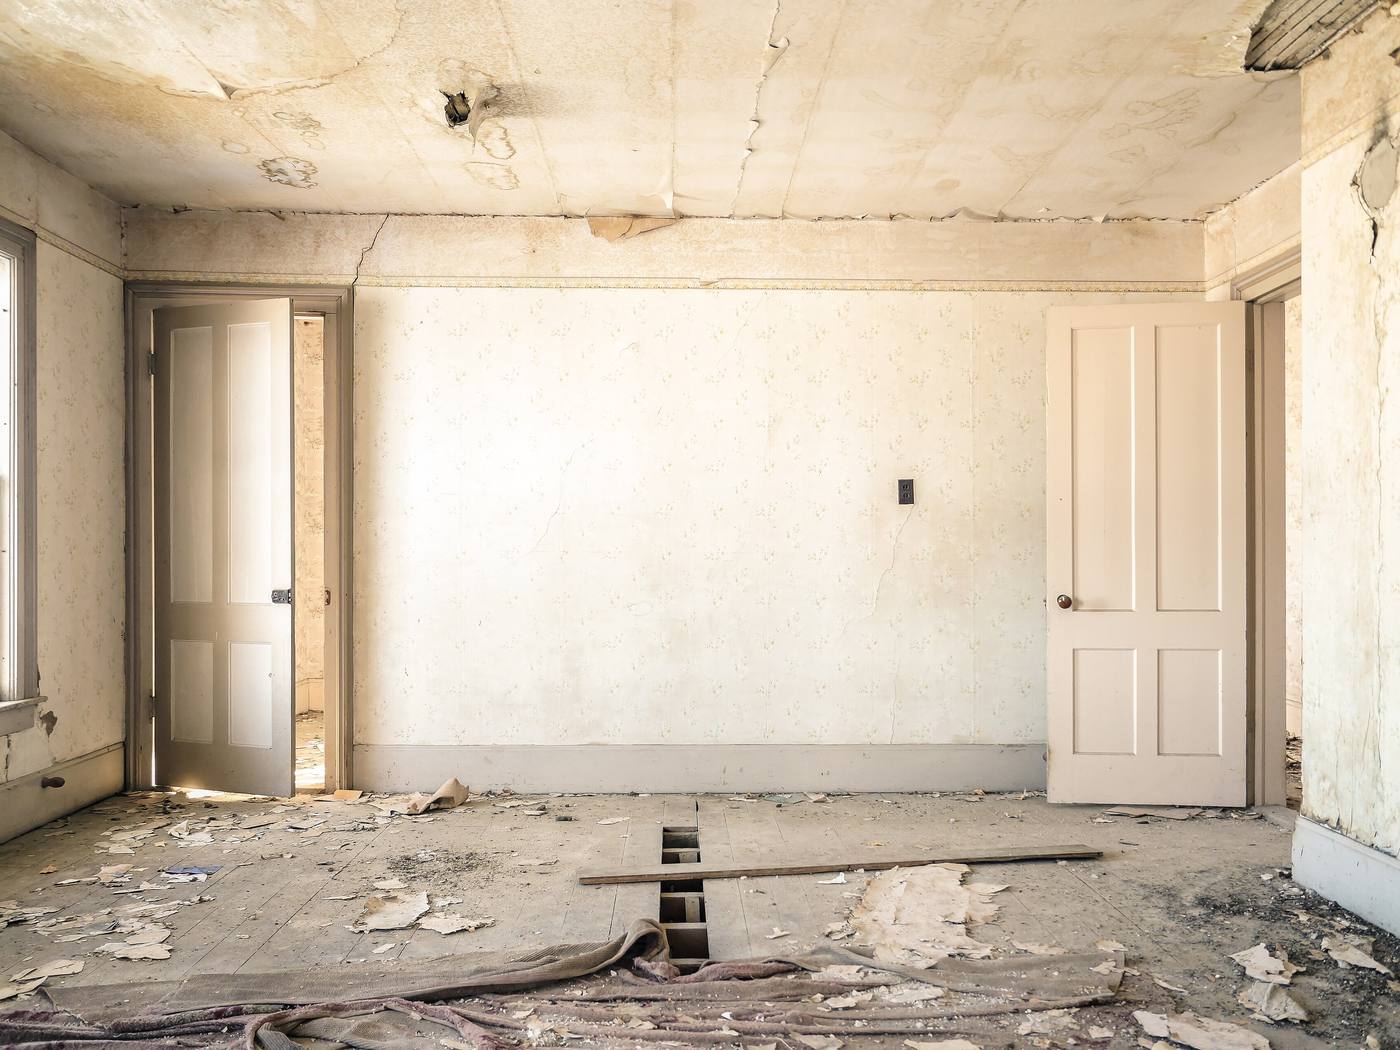
- Ceiling · stainwater stain and hole, approx. 1.5 ftAI suggested
- Ceiling · cracklong crack along board jointAI suggested
- North wall · crackdiagonal, 0.5 mm wide, 10 in longHuman verified